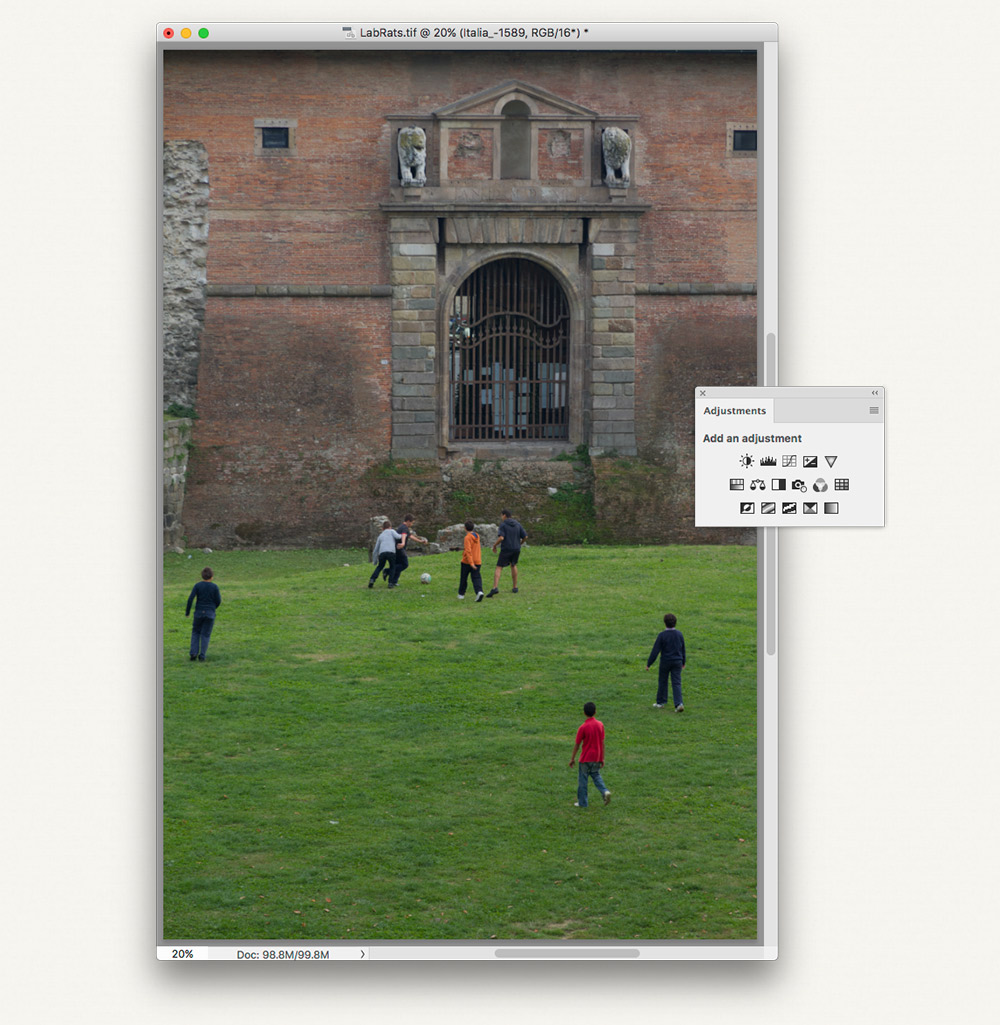
The most vibrant colors are the grass and the orange and red shirts.
Luminous Works Class Calendar | More Tips
At the end of my April 2017 talk to the Seattle Area Photoshop User Group, one of the very last questions was about when and if to work in Lab mode, rather than RGB, for example. Since my speaking time was well up, I muttered that it just wasn't worth it. As always, however, I hate making a claim without evidence.
Since then, I've found myself in those dark corners of the internet where self-proclaimed Photoshop gurus claim that Lab mode, a scary place for the uninitiated, is where mysterious and wonderful things can be achieved with images that cannot be done in any other way. Then they spout smoke and hokum to prove their point.
They always start with a terribly flat and low-saturation image. It makes me sad that they apparently have never learned how to process their images in either Adobe Camera Raw or Lightroom. They convert to Lab mode from RGB. Then they proceed to show how making adjustments to the L (luminance) channel affects only tone and not color, and adjustments to the a and b channels affect only color and not tone (they always use Curves! There are other adjustments, dudes!). Then there's the pronouncement that in RGB, one always affects both tone and color with any adjustment, which can be bad, and thus their Lab workflow is the only way to avoid messing up one while adjusting the other. At that point we're to become their acolytes because Lab mode is just too hard for mere mortals like us.
In short: hogwash. Don't let the Lab-rats lead you down their maze for little or no reward!
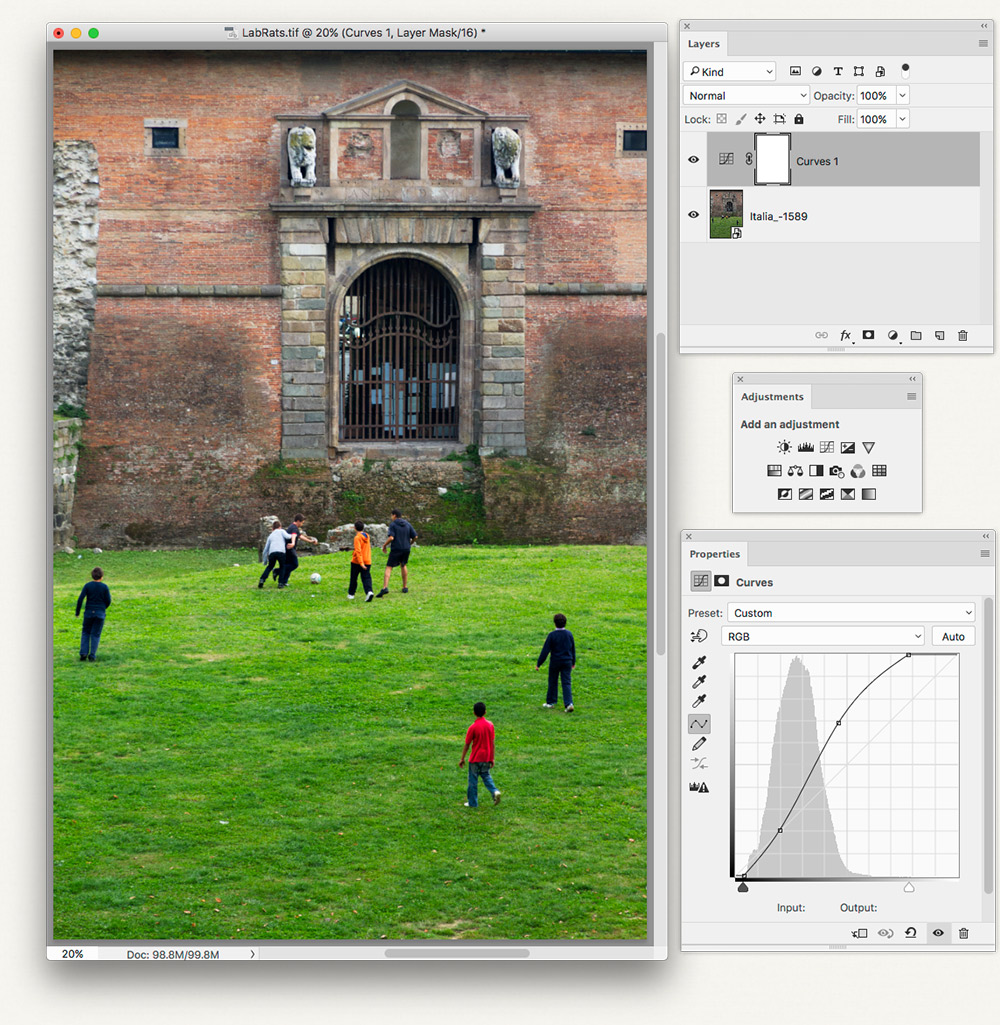
I use the Adjustments panel to create an Adjustment layer because they are non-destructive and have many other benefits. I chose Curves (funny, right?) to increase the contrast and noted that those brightly colored shirts, especially the red one, have begun to lose definition. It's like those Lab-rats are right...
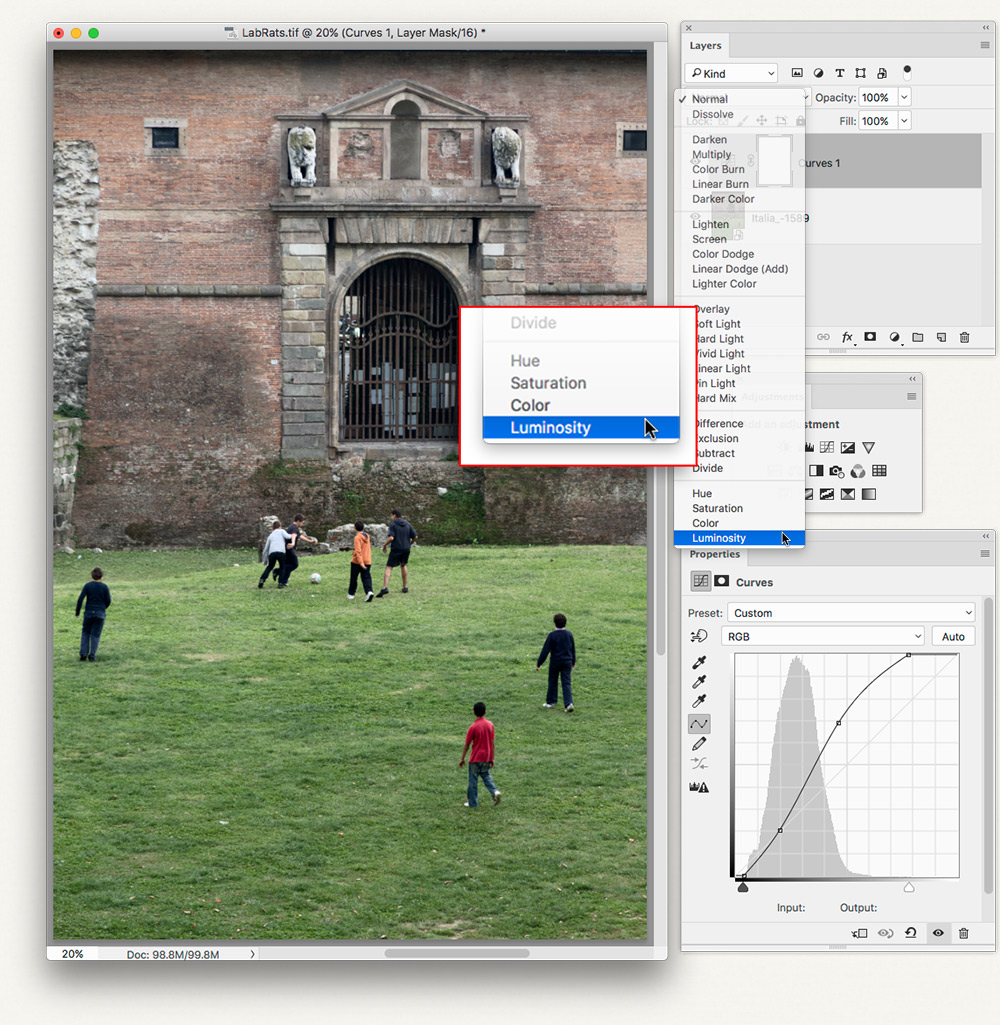
Adjustment layers are layers, friends! And layers have Blend Modes which can restrict which components of an image they affect. To restrict the effect of the contrast enhancement to just luminance, I chose Luminosity mode. No more effect on color!
Since my original layer is a Smart Object, I can apply filters to it (like for sharpening) and change their Blend Modes, too.
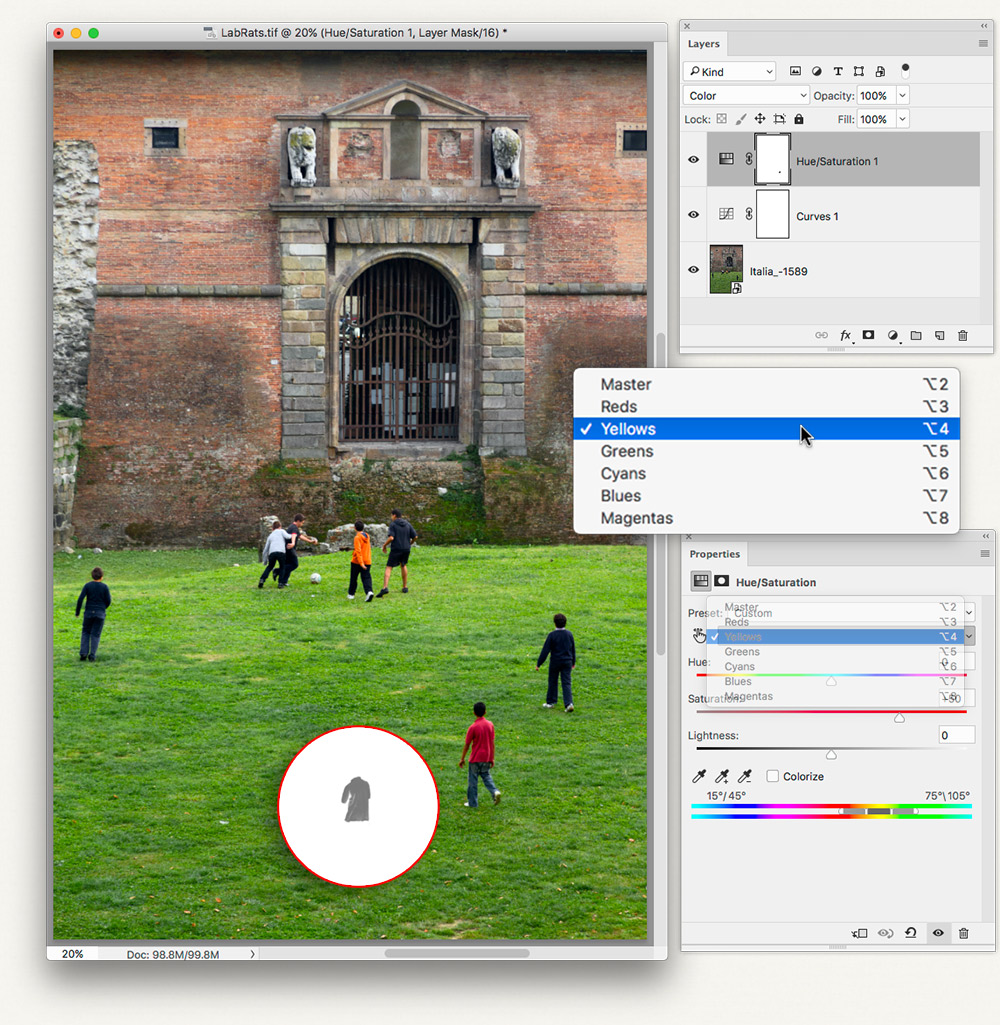
The Lab-rats would have you do a careful Curves edit to the a and b channels to increase saturation. It works, but we have several ways to do that in RGB, and we can control how much saturation each hue gets! So I created a Hue/Saturation Adjustment Layer. I made little or no change to the global saturation, but applied different amounts of increase to Reds, Greens, and Yellows.
Adjustment Layers have masks, too. Since I needed to pump up the saturation in the red brick walls, I then needed to tone down that increase on the red shirt. So I masked that shirt a little to keep it tame. To ensure that the Hue/Saturation layer was affecting only color, I changed its Blend Mode to Color.
Most ironically, we probably could have achieved the same result in Adobe Camera Raw or Lightroom, as they have great controls for affecting tone and color on a hue-by-hue basis and can have masked adjustments, too. But that's another cranky lesson.